
Google ReCaptcha is a captcha like system. It assures that a computer user is a human. It is the best and most used captcha system available where users are only required to click on a checkbox and in some cases select some similar images.
In this tutorial, we will implement Recaptcha in forms in Laravel.
Table of Contents
Creating a new application
Let’s start by creating a new laravel project. To do this, run the following command:
laravel new ReCaptcha
It will create a new laravel project named ReCaptcha. I am using laravel 5.6.12.
Creating a VirtualHost
We need to create a virtual host to register our website on google reCAPTCHA. If you are using homestead, you are already doing it by adding your site to sites section in Homestead.yaml file.
I am using wamp as my local development environment. So, in apache<version>/conf/extra folder, open the file named httpd-vhosts.conf. Add the following at the end of the file.
<VirtualHost *:80>
	ServerName captcha.test
	DocumentRoot "<project-public>"
	<Directory  "<project-public>">
		Options +Indexes +Includes +FollowSymLinks +MultiViews
		AllowOverride All
		Require local
	</Directory>
</VirtualHost>
Don’t forget to replace <project-public> with the absolute path of your laravel project public directory. You can also change captcha.test as the address.
You are also required to add the following at the end of your hosts file.
127.0.0.1	captcha.test
::1	captcha.test
In the above lines, captcha.test is the web address that we will hit through the browser. Now restart your local development server (apache).
Now, if you hit captcha.test or whatever you set as your address in the previous steps, you will see the laravel development homepage.
If you see the above page, you have successfully set up the virtual host.
Registering the site
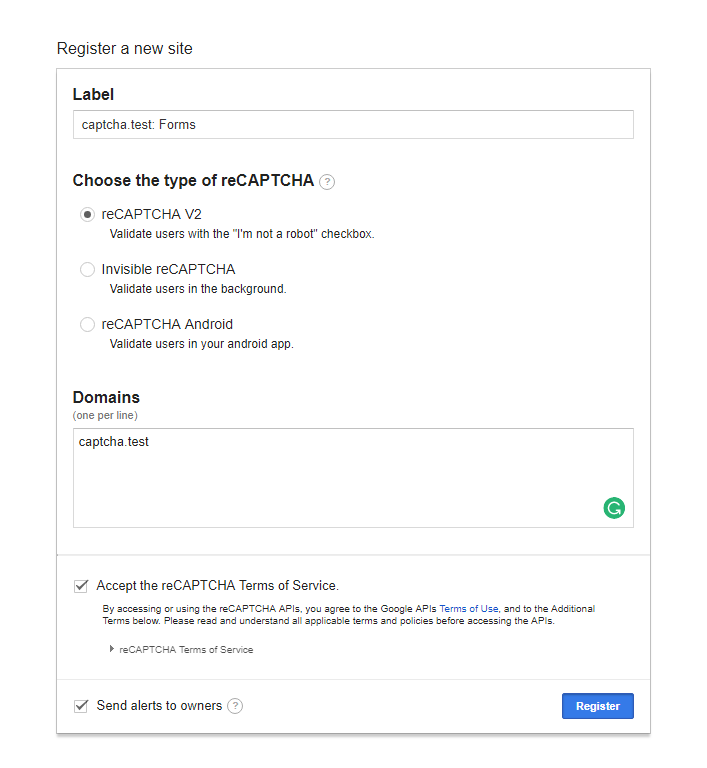
Now, visit Recaptcha new site registration page. Add a label to identify the site. I will name mine captcha.test: Forms. Now choose the type of reCAPTCHA as reCAPTCHA V2. Now you need to add the list of domains, this captcha would work on. You can insert multiple domains, captcha placement will work both on your development and production domain. It will not work on domains other than present in the list. I will add captcha.test in the list. Now accept the Terms of service and click Register.
After registration, you will be redirected to captcha keys and a simple guide on how to implement it.
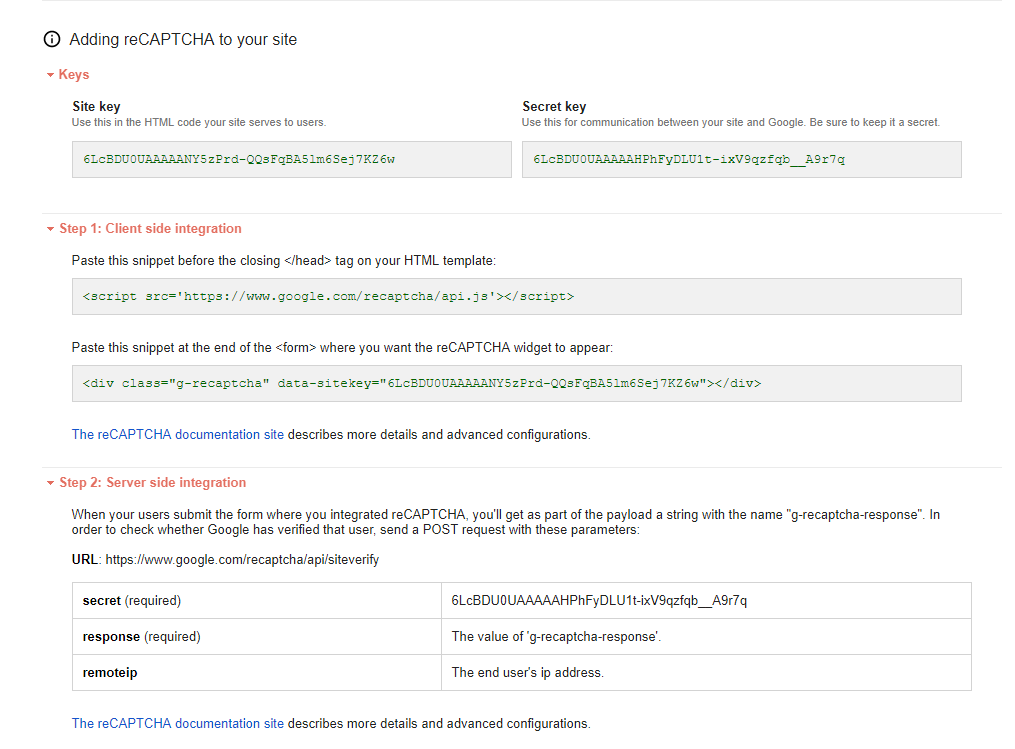
Now, I will store Site Key and Secret Key in .env file.
CAPTCHA_SITE_KEY=6LcBDU0UAAAAANY5zPrd-QQsFqBA5lm6Sej7KZ6w
CAPTCHA_SECRET_KEY=6LcBDU0UAAAAAHPhFyDLU1t-ixV9qzfqb__A9r7q
Adding Authentication
We will be adding it to the default laravel authentication form. So, first go to your .env file and set up your database credentials.
Now run the following command to generate authentication scaffolding.
php artisan make:auth
Now migrate your database by running the following command.
php artisan migrate
Client-side integration
Let’s first integrate ReCaptcha on the client side. Go to resources/views/auth/register.blade.php and add the following after password-confirm row and before the register button.
<div class="form-group row">
    <div class="col-md-6 offset-md-4">
        <div class="g-recaptcha" data-sitekey="{{ env('CAPTCHA_SITE_KEY') }}"></div>
        @if ($errors->has('g-recaptcha-response'))
            <span class="invalid-feedback" style="display: block;">
                <strong>{{ $errors->first('g-recaptcha-response') }}</strong>
            </span>
        @endif
    </div>
</div>
You can find the code for the full file on GitHub Repo.
We are adding a simple div with captcha site key. When the form is submitted, g-recaptcha-response will be set as the key for the token value. We will handle backend logic for that later.
It is also required to add the JavaScript file. Go to resources/views/layouts/app.blade.php and add a yield blade component before the closing head tag.
    @yield('head')
</head>
Now go back to register.blade.php file and add the following after the extends('layouts.app').
@section('head')
    <script src='https://www.google.com/recaptcha/api.js'></script>
@endsection
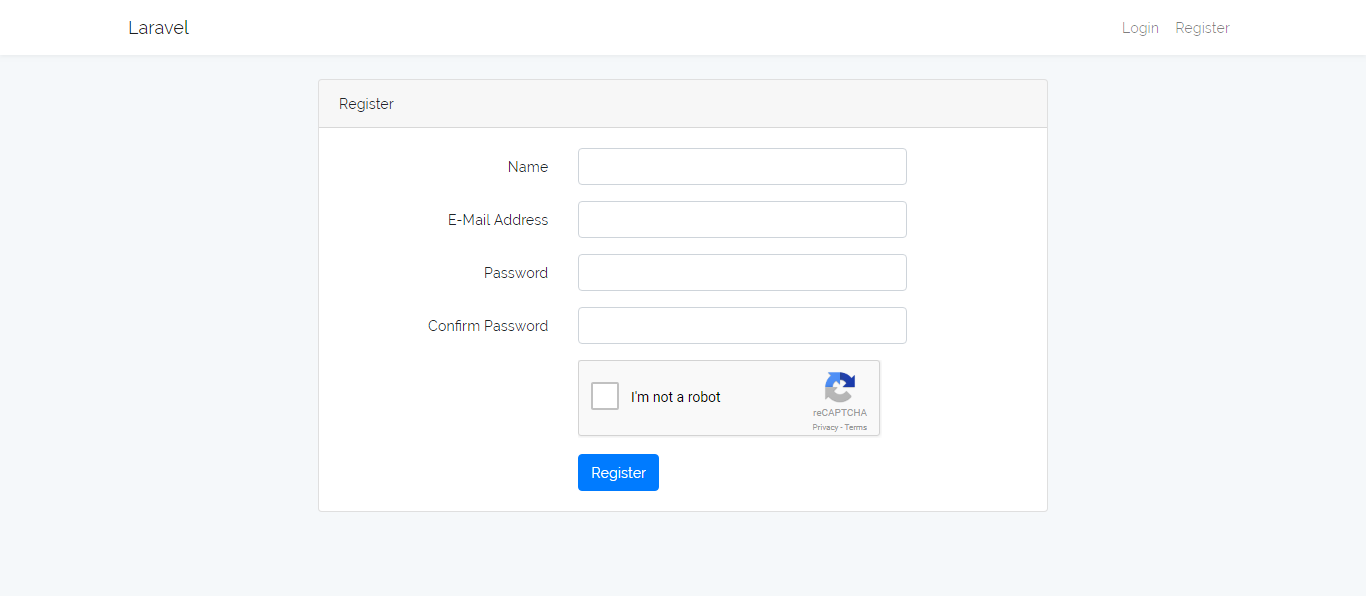
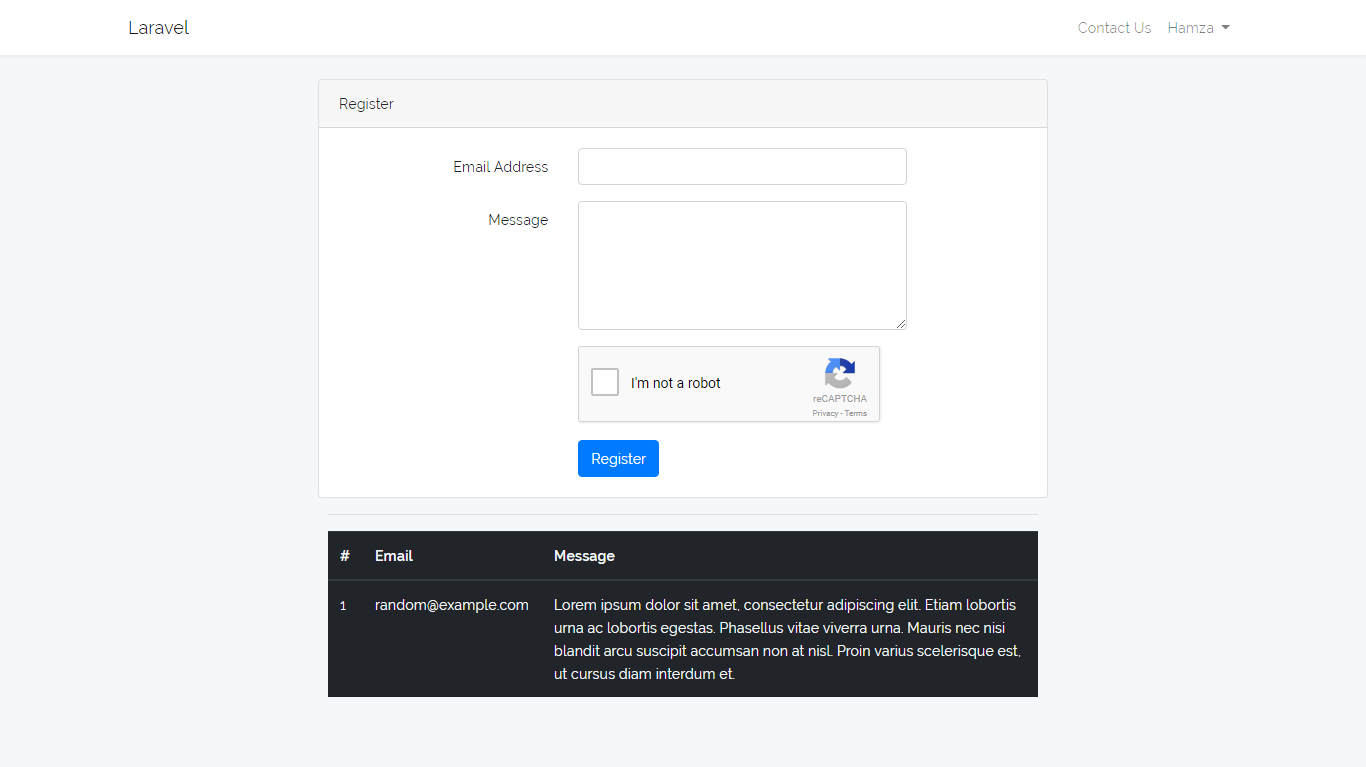
Now, our register form looks like this:
Backend Integration
Let’s implement the backend logic for reCAPTCHA. First, we need to require google/recaptcha package to work with reCAPTCHA. To require the package through composer, run the following command:
composer require google/recaptcha "~1.1"
Custom Validation Rule
We will be creating a custom validation rule. To do this, run the following command to create a new rule named Captcha.
php artisan make:rule Captcha
Now open the Captcha.php file located in app/Rules directory and copy the contents below to the file.
<?php

namespace App\Rules;

use Illuminate\Contracts\Validation\Rule;
use ReCaptcha\ReCaptcha;

class Captcha implements Rule
{
    /**
     * Create a new rule instance.
     *
     * @return void
     */
    public function __construct()
    {
        //
    }

    /**
     * Determine if the validation rule passes.
     *
     * @param  string  $attribute
     * @param  mixed  $value
     * @return bool
     */
    public function passes($attribute, $value)
    {
        $captcha = new ReCaptcha(env('CAPTCHA_SECRET_KEY'));
        $response = $captcha->verify($value, $_SERVER['REMOTE_ADDR']);

        return $response->isSuccess();
    }

    /**
     * Get the validation error message.
     *
     * @return string
     */
    public function message()
    {
        return 'Complete the reCAPTCHA to submit the form';
    }
}
In passes method, we are first creating a new instance of the reCAPTCHA service using our secret key. When the user submits a form, we will get a token along with our other form data on the key g-recaptcha-response. We use that to verify if the users have successfully checked the captcha. After creating a new instance, we are verifying the response by passing the token which is present in $value and the user’s IP address which is present in $_SERVER['REMOTE_ADDR']. Then, we are returning the boolean for success (true) or failure (false) by calling isSuccess method.
Using the Validation Rule
Now, that we have created our custom rule, we just need to add it into the laravel registration process. To do this, go to app/Http/Controllers/Auth/RegisterController.php and replace the contents of validator method with the contents below. Also, do not forget to require the Captcha class.
use App\Rules\Captcha;

protected function validator(array $data)
{
    return Validator::make($data, [
        'name' => 'required|string|max:255',
        'email' => 'required|string|email|max:255|unique:users',
        'password' => 'required|string|min:6|confirmed',
        'g-recaptcha-response' => new Captcha()
    ]);
}
Here, we are simply adding g-recaptcha-response and setting it to a new instance of our rule Captcha class.
Now, the reCAPTCHA is all set up and ready to go. We can also add it to the login form and in our other forms in the same way. You can check the code on GitHub where I have integrated it not only to the login form but users contact us form as well.
If you have any queries, feel free to comment.